The signing process for eSignatures is designed to be flexible and secure. The signature correspondence can be both email and text message, and the links used are secured end-to-end. The client has the option to decline the eSignature when required, and they can download the document prior to signing to review it locally.
eSignatures have sessions attached to them for authenticity, to prove the client's information, such as location and device used to sign the document. This information is then generated into a certificate of authenticity.
Clients are provided with multiple methods to sign a document, including manually drawing the signature via mobile and computer, picture upload, or adopting one of the automatically generated signatures.
The eSignature adopted is used throughout the document, to ensure uniformity in signatures, exactly like a physical copy of the document to be signed. It can also be saved for future uses.
Topics covered in this article:
How to sign an eSignature
Once a client has received a secure link to complete an eSignature envelope, the signature process is designed to be efficient for the client. Clients are given multiple options to assist them in completing the eSignature envelope.
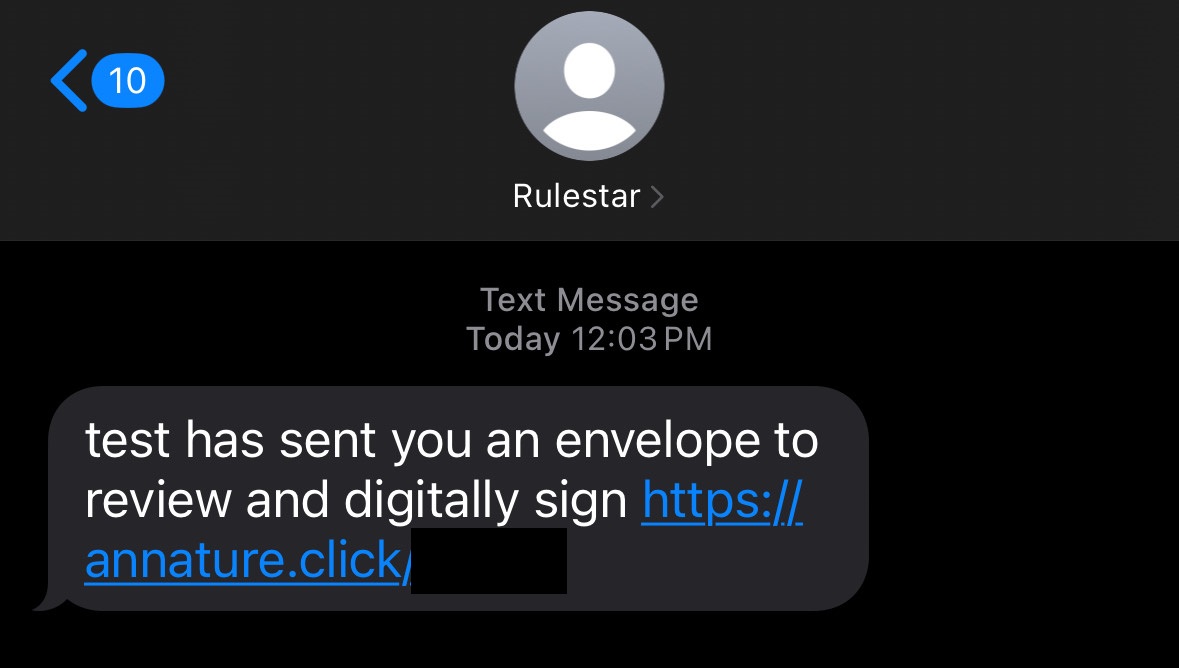
The secure link will be sent either through email or through a text message.
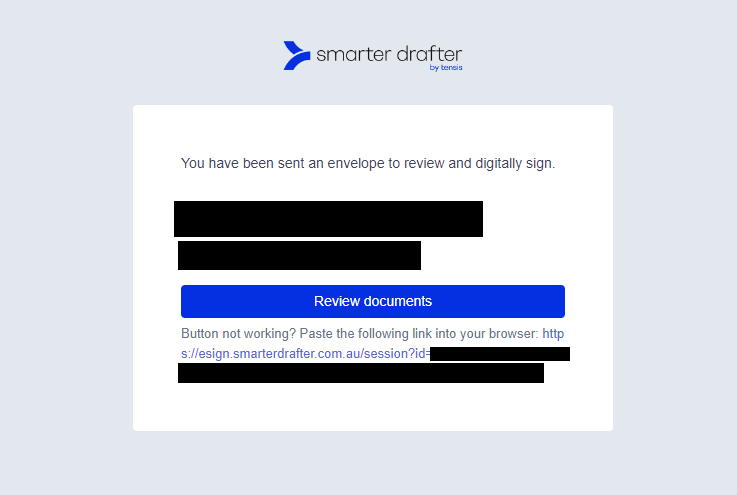
From the email, the "Review documents" button will direct the client via the secure link. The text message will contain a direct secure link.
Following the secure link will lead to the signature portal.
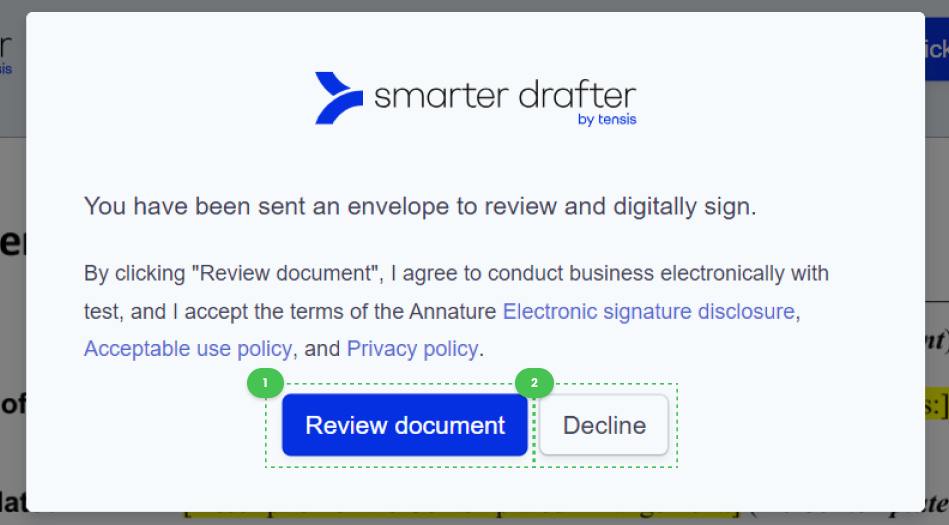
A prompt will appear when the document loads which will ask the user either to:
- Review document, where clicking this option confirms the recipient of the document and the client accepts the terms and conditions associated with the eSignature process. The client will then be given access to the document to review its contents and provide their signature.
- Decline the eSignature envelope, which prompts the client to enter a reason for declining, which will be sent back to the law firm with an email of eSignature envelope rejection.
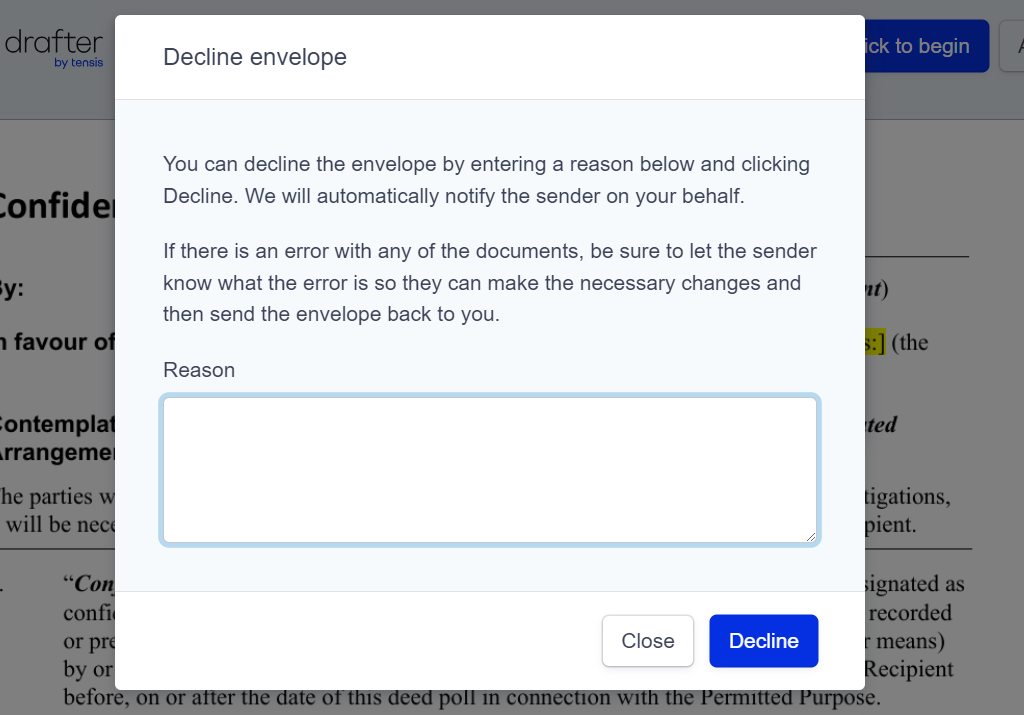
Clicking Close will close this prompt and return the user to the previous prompt.
Note: If the Review documents button is stuck loading, simply refresh the page. No data will be lost, and access to the eSignature session will be intact.
After clicking Review document, the client is given the freedom to navigate the document and is expected to review the document's content in full before signing the envelope.
After reviewing the document, at the top of the screen there will be options to guide the user:

- This image will reflect the law firm's logo if branding has been added.
- Click to begin will direct the client to the first instance of where their interaction is required.
- Actions will open a menu for envelope management.
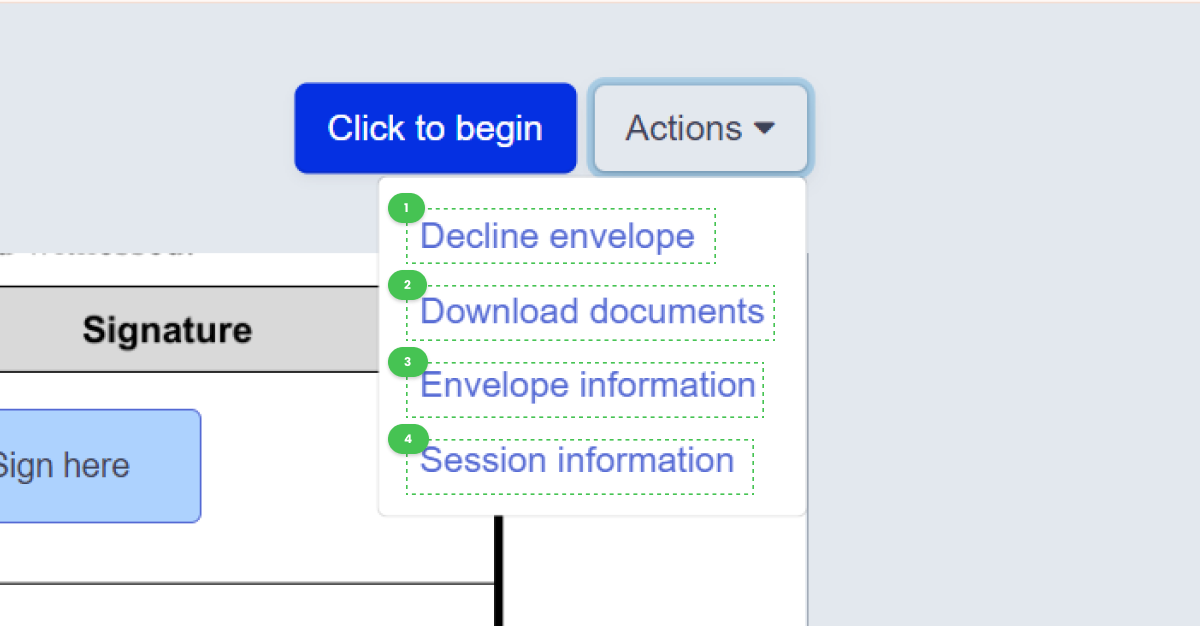
- Decline envelope prompts the client to enter a reason for declining, which will be sent back to the law firm with an email of eSignature envelope rejection.
- Download documents allows the client to download the document locally.
- Envelope information shows relevant information about the eSignature envelope, including document name, time sent, sender and law firm names, and the email address sent from.
- Session information will show information about the current eSignature session, which is essential for the certificate of authenticity.
When the client is ready to enter their signature, they need to click Sign here on the document.
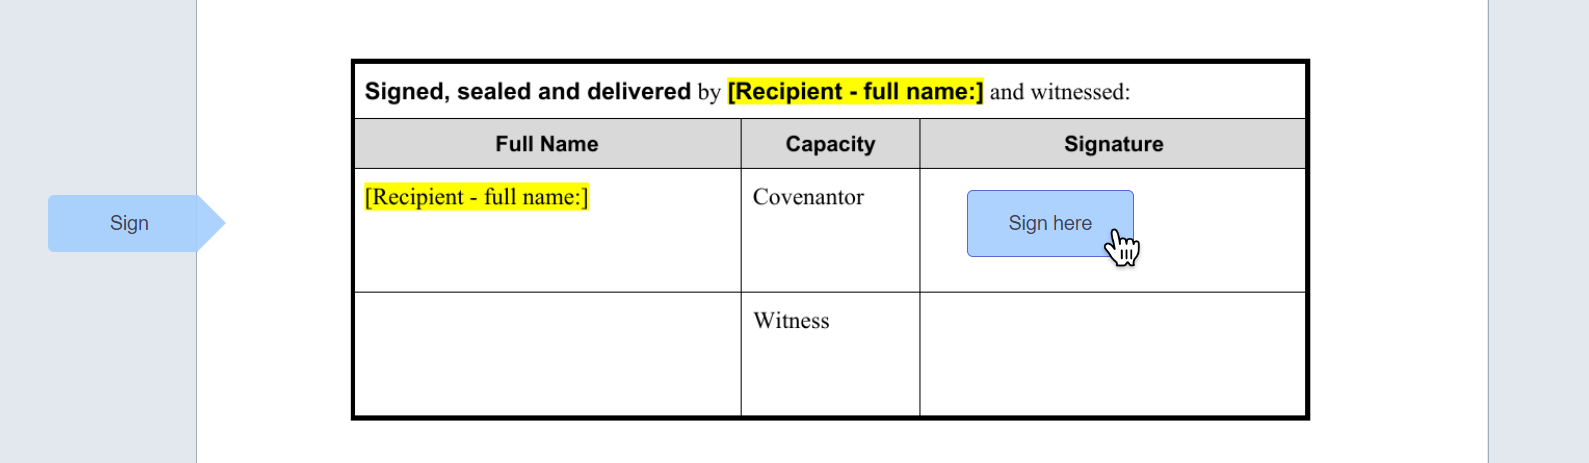
Note: While reviewing the document, required user interaction will be shown with arrows on the left side of the document. For example, an arrow with Sign will be shown where the client is required to enter their signature.
In this example, the user can scroll to the Sign arrow and click Sign here without needing to click Click to begin.
A prompt for the preferred eSignature method will appear.
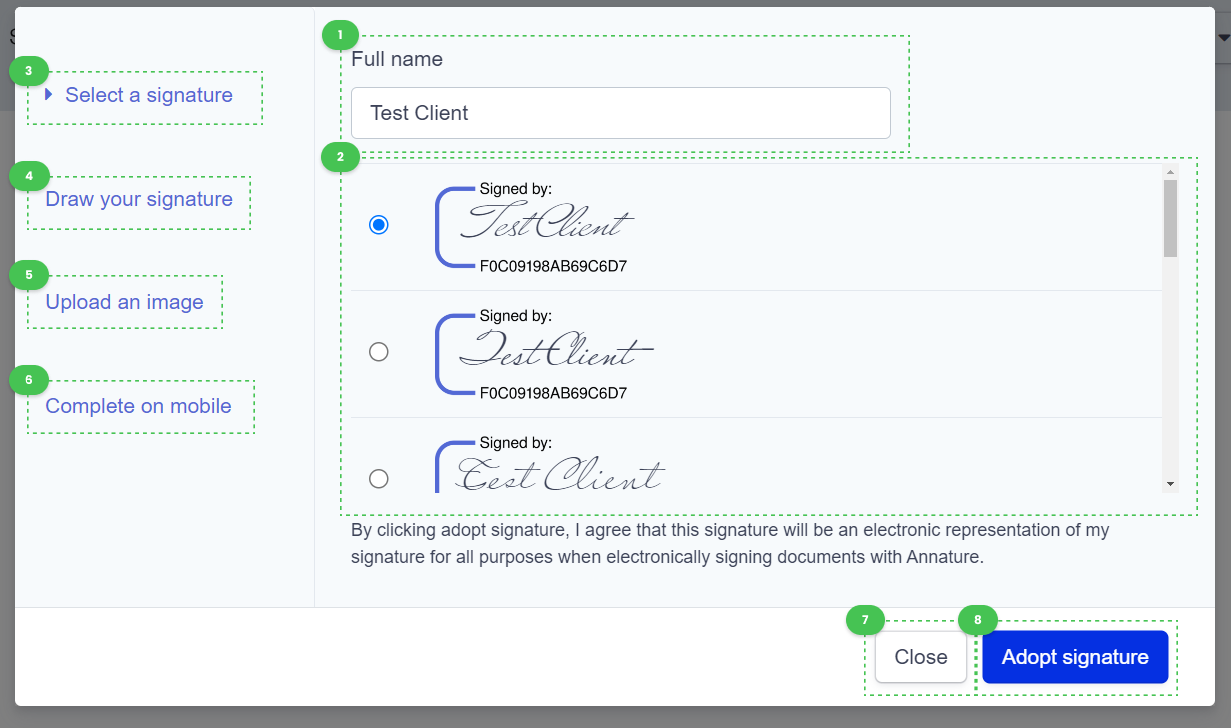
- The Full Name of the client, which can be changed. The changes will be reflected in automatically generated eSignatures.
- The relevant options and information for the signature method selected will be shown here.
- Select a signature allows the client to use an automatically generated signature, based on the Full name entered.
- Draw your signature allows the client to draw their signature using their device's peripherals, such as a mouse, touchpad or trackpad.
- Upload an image allows the client to upload a picture of their signature, such as the one on their driver's license or passport. We recommend a high-quality picture is used, where the signature is easily visible.
- Complete on mobile allows the client to generate a QR code to scan on their smartphone, where they are prompted to draw their signature with their finger on their smartphone's screen.
- Close will close this prompt and return the client back to the document.
- Adopt signature will use the client's choice of signature from this prompt throughout the document in the locations where their signature is required.
After adopting the signature and filling out the necessary details for the signee, the client's signature and details will be added to the document and the client will be directed to the top of the page to click Finish signing.
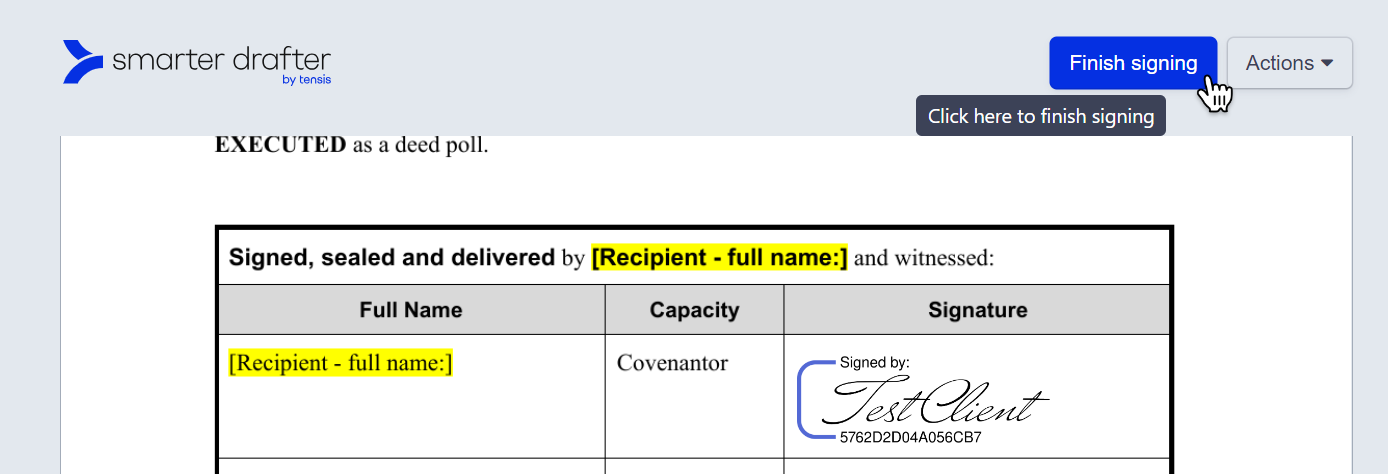
Clicking Finish signing will complete the signing process for the client.
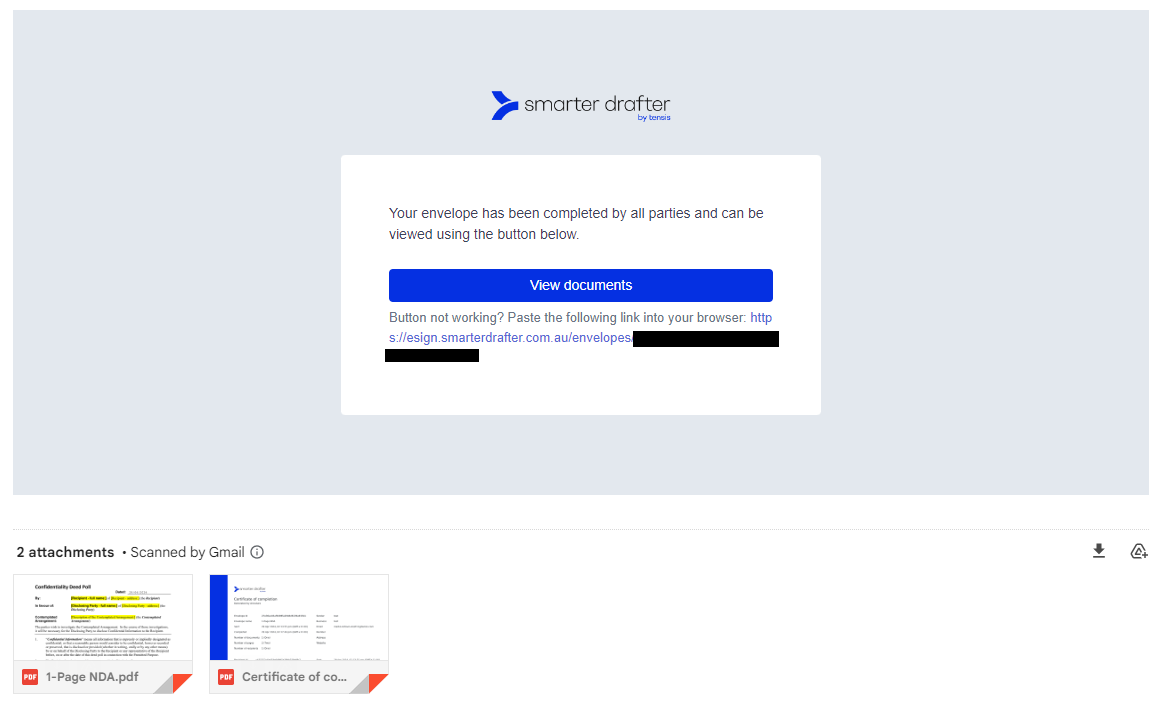
After the document has been completed by all the signing parties, the client, other signing parties and the law firm will be emailed a copy of the completed signed document, a link to view the completed signed document online and a certificate of authenticity.